Start streaming music in just a few minutes,Winamp paired with the SHOUTcast DSP plugin is your go-to solution. This guide will walk you through the setup process for streaming to Icecast or SHOUTcast servers available from DOScast.
Setup - Step by Step:
Setup - 1: Plug-in Integration
Before diving into the setup, make sure you have the essentials:
- Operating System: Windows Vista, Windows 7, Windows 8, Windows 10
- Latest version of Winamp: Download
- Nullsoft Shoutcast Source DSP Plug-in for Winamp: Download
Also, ensure you have a reliable internet connection. While broadcasting is possible with a 56k connection, DSL or Cable is recommended for optimal performance.
If you have the requirements, proceed. If not, address any missing components before continuing.
1. Install Nullsoft Winamp and the Shoutcast DSP Plug-in without closing Winamp during installation.
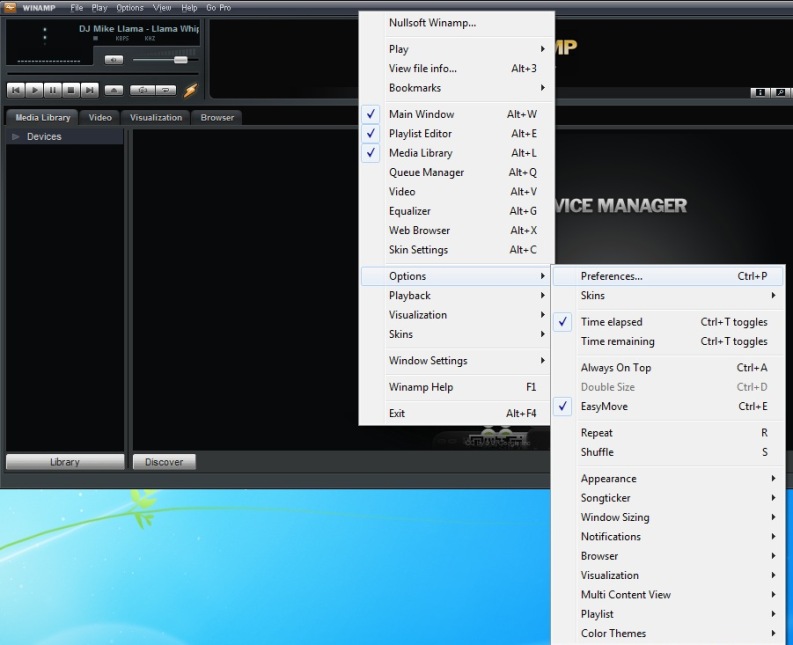
2. Launch Winamp, right-click on the title bar (reading "Winamp"), hover over "Options" in the menu, and click "Preferences." Alternatively, press CTRL-P on your keyboard.
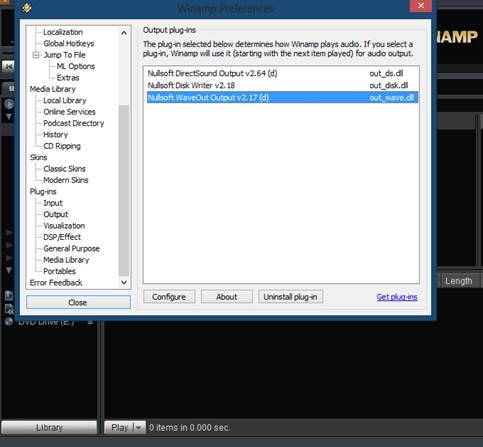
Setup - 2: Output Configuration
1. In the Preferences dialogue, click on the item labeled "Output" under the Plug-ins category.
2. Choose "DirectSound output" or "Nullsoft Crossfading Output." For this tutorial, we'll use "DirectSound output."
Setup - 3: Enable Shoutcast DSP Plug-in
1. Enable the Nullsoft Shoutcast DSP plug-in by choosing the item labeled "DSP/Effect" under the Plug-ins category.
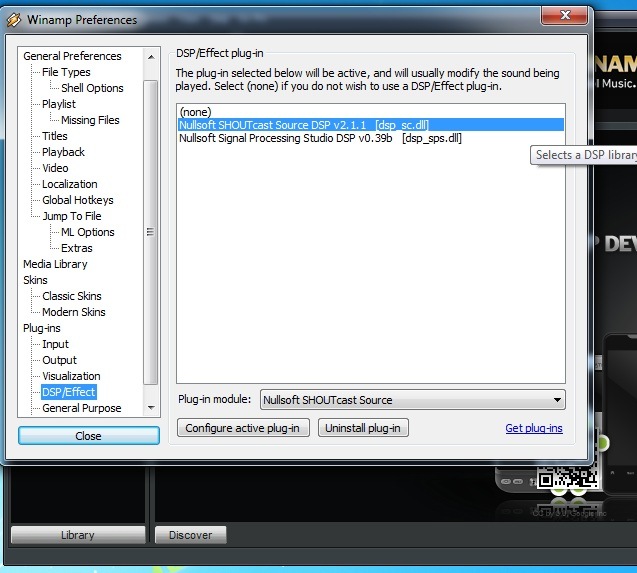
2. Select "Nullsoft SHOUTcast Source DSP."
3. Close the preferences dialogue; a new window titled "Shoutcast Source" should appear.
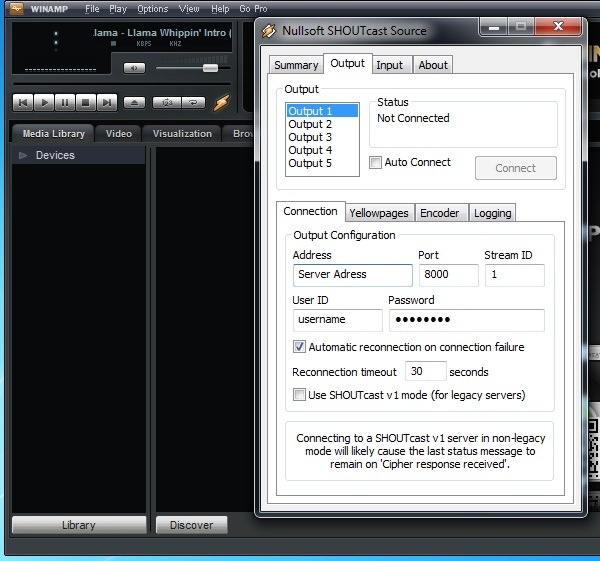
Setup - 4: Configure Shoutcast Source
1. Obtain your Doscast server address, port, and password.
2. Click on the "Output" tab in the Shoutcast Source window.
3. Under "Address," enter your Doscast server address "sky.doscast.com" (without http:// or www).
4. Provide the Shoutcast source with the server port and password.
5. Optional settings like "Connect at Startup" and "Reconnection Timeout" can be adjusted based on your preferences.

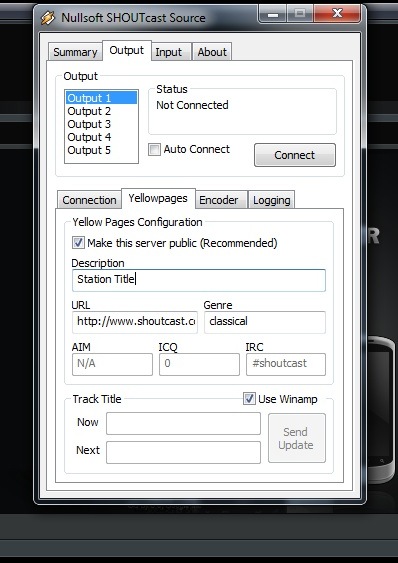
Setup - 5: Yellowpage Settings
1. Click the "Yellowpages" button to configure settings for listing on www.shoutcast.com.
2. Check "Make this server public" if you want your station listed. Fill in "Description," "URL," and "Genre" fields as appropriate.
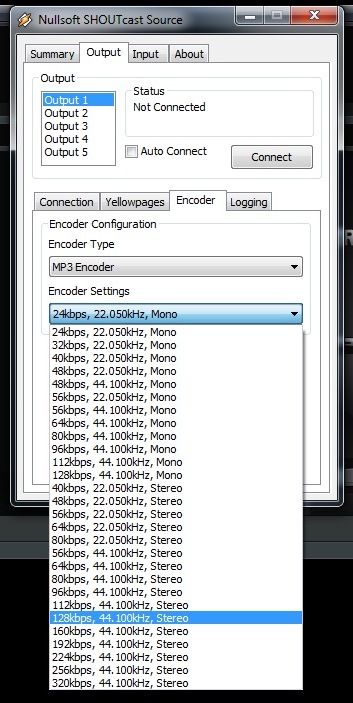
Setup - 6: Encoder Configuration
1. Click on the "Encoder" tab to specify the bitrate. Choose a bitrate suitable for your audience (e.g., 64kbps to 128kbps).
2. Decide on a mono or stereo signal based on your preference.
Setup - 7: Input Configuration
1. Click on the "Input" tab to set up the source.
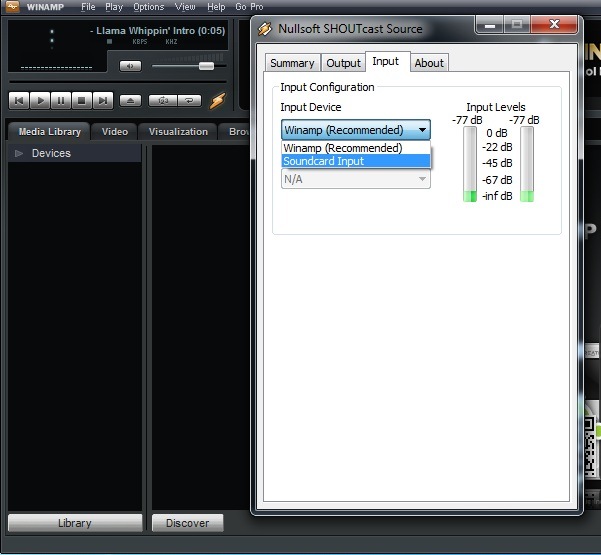
2. By default, the "Input Device" is Winamp, suitable for streaming a playlist. If you want to broadcast other computer sounds, select "Soundcard Input."
3. Choose "44100Hz, Stereo" as your Input Setting.
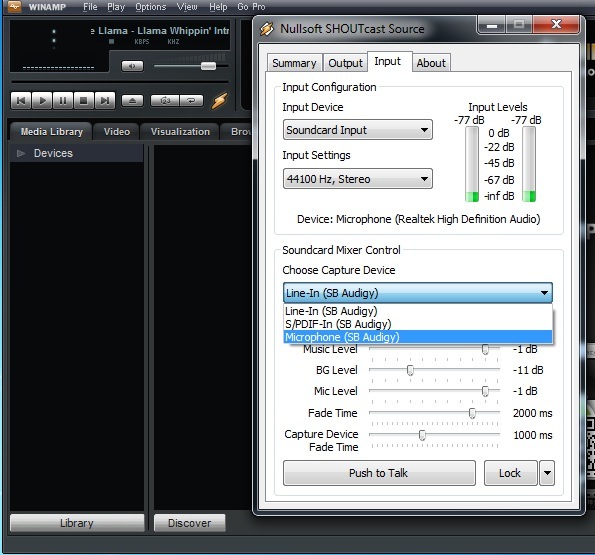
4. Under "Mic Input," select either "Microphone" or "Line Input" based on your setup.
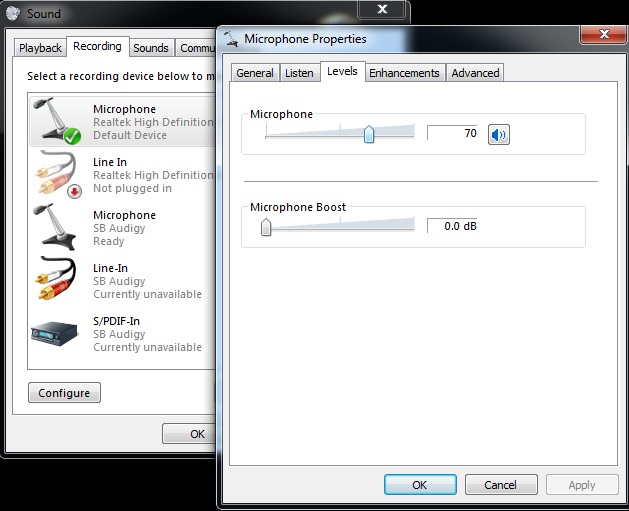
5. Click "Open Mixer" to configure your sound card. Ensure you have checked the recording control option labeled "Stereo Mix," "Wave Mix," or equivalent.
6. Close the Windows Mixer after configuration.
Congratulations! You're now ready to connect to your streaming audio server and test your broadcast settings. Click the 'Output' tab, then the 'Connect' button. If you've opted for a microphone as a secondary input, explore the 'Input' dialogue for additional options. Adjust sound levels as needed.
If you encounter any issues or need further assistance during the setup process, feel free to reach out to our Support Team at [email protected] or through the Ticket Submission form. Happy streaming!
